Looking to refresh your home without breaking the bank? Refinishing furniture is the perfect solution! This fun DIY project lets you transform old, worn pieces into beautiful, stylish additions to your space. Whether it’s a scratched coffee table or a vintage chair, refinishing can bring new life to your furniture. In this blog, we’ll share simple tips and inspiring ideas to help you get started on your own furniture makeover. Let’s dive in and discover the hidden beauty in your home
Benefits of Refinishing Furniture
Refinishing furniture is an incredibly rewarding way to transform old or outdated pieces into stunning focal points that feel brand new. Imagine saving money, customizing every detail to match your style, and adding unique charm to your space—all while being eco-friendly! Refinishing allows you to bring out the natural beauty and durability of older, well-crafted furniture that often lasts longer than today’s mass-produced pieces. Learn how to polish furniture at home is a perfect way to preserve sentimental items, keeping family history alive with a fresh, polished look. Each refinished piece tells a story, adding character to your home in a way that store-bought furniture simply can’t match. Not only does refinishing breathe life back into furniture, but it also offers the personal satisfaction of creating something beautiful and truly unique—making it an experience that’s just as valuable as the finished piece itself.”
1. Tools for Refinishing Furniture
- Sandpaper (various grits, from coarse to fine)
- Sanding block or electric sander (for faster, more even sanding)
- Wood filler (to repair cracks or holes)
- Paint or stain (depending on the desired finish)
- Paint brushes, foam brushes, or rags (for applying stain or paint)
- Paint stripper (optional, for removing old finish on heavily coated pieces)
- Primer (if painting, to help paint adhere better)
- Wood conditioner (if staining, for a more even color)
- Sealant or topcoat (like polyurethane, to protect the finish)
- Protective equipment (gloves, mask, and eye protection for safety)
- Soft cloths or tack cloth (to remove dust between steps)
2. Prep the Surface
Prepping the surface is a key step in refinishing furniture to ensure a smooth and lasting finish. Start by cleaning the piece thoroughly with a mild soap solution to remove dirt and grease—just be careful not to soak the wood. After it dries, take off any hardware like knobs or hinges to keep them safe and out of the way. Look over the furniture for any cracks, holes, or loose parts. Fill small cracks with wood filler, and use wood glue to secure any loose joints. If the furniture has a thick old finish or paint, you might need a paint stripper to remove it, giving you a fresh surface to work on.
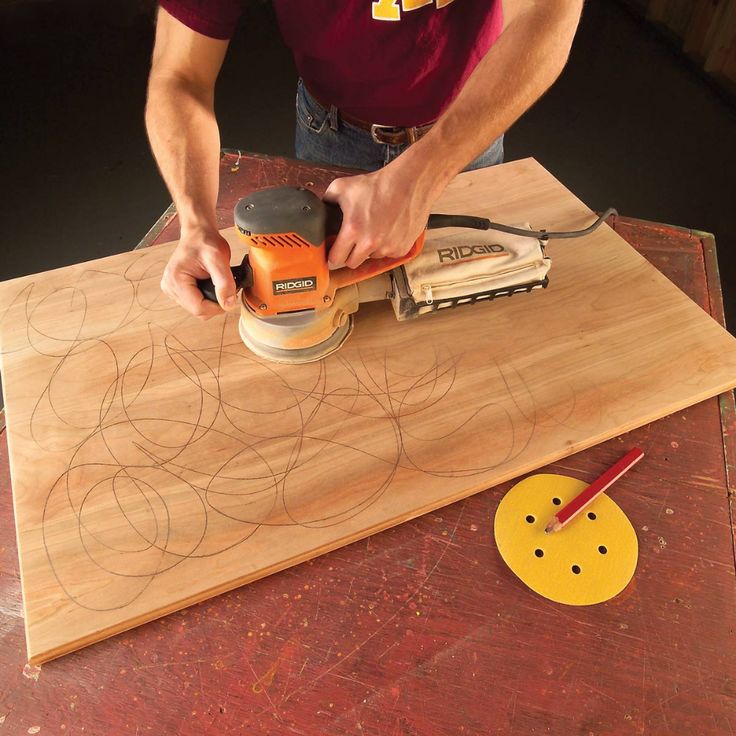
Next, sand the furniture, starting with coarse sandpaper to remove old finish, and then use finer grits to smooth everything out. Always sand along the wood grain to prevent scratches. Once you’re done sanding, wipe down the piece with a tack cloth to remove any dust, which helps the finish stick better. If you plan to paint, consider adding a layer of primer to help the paint go on smoothly and last longer. Prepping carefully makes a big difference in the final look, setting the stage for a beautiful, professional-looking finish.
3. Strip Old Finish (If Necessary)
Stripping the old finish from furniture makes it easier for new paint or stain to stick and look good. Start by working in a well-ventilated area or outside to avoid strong fumes. Apply a thick layer of paint or varnish stripper to the furniture using a brush. Let it sit for about 15–30 minutes so it can soften the old finish. Then, gently scrape off the old finish with a scraper, being careful not to damage the wood.
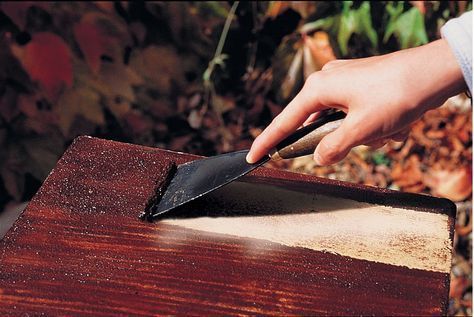
For small or hard-to-reach areas, use a wire brush or an old toothbrush. Wipe the piece with a clean cloth to remove any leftover residue. If some spots still have finish, repeat the process. Let the furniture dry completely before moving to sanding. This step creates a smooth, clean surface for a great-looking new finish.
4. Sand Thoroughly
Sanding is a crucial step when refinishing furniture, as it helps create a smooth, clean surface that ensures the new finish will adhere properly and look professional. Begin with a coarse sandpaper, usually around 80–100 grit, to remove any old finish, scratches, or uneven areas. Using an electric sander can make this step faster and more even, but a sanding block works well for smaller pieces.
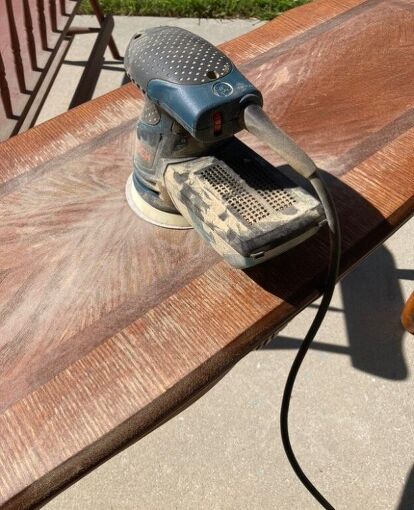
Always sand along the wood grain to avoid visible scratches that go against the natural lines of the wood. Take your time with this step, especially on areas with old paint or varnish, as a smooth foundation is essential.
Once the initial sanding is complete, switch to finer sandpaper, like 150–220 grit, to smooth out any remaining roughness and prepare the surface for a flawless finish.
After you’ve finished sanding, it’s essential to remove all dust particles from the surface. Use a tack cloth, which is slightly sticky and designed to pick up fine dust, or a damp microfiber cloth to wipe down the piece. Any leftover dust could stick to the paint or stain, creating a rough texture. This step is worth the extra attention, as it ensures that your new finish will go on smoothly and last longer. Taking the time to sand thoroughly creates a perfect base for applying your stain or paint and gives you a beautifully finished piece.
5. Apply Primer (for Paint) or Conditioner (for Stain)
Applying primer or wood conditioner is an essential step to achieving a beautiful, long-lasting finish on your furniture. If you’re planning to paint, primer works as a base layer that improves paint adhesion, creates a smooth, even surface, and helps prevent chipping and peeling over time.
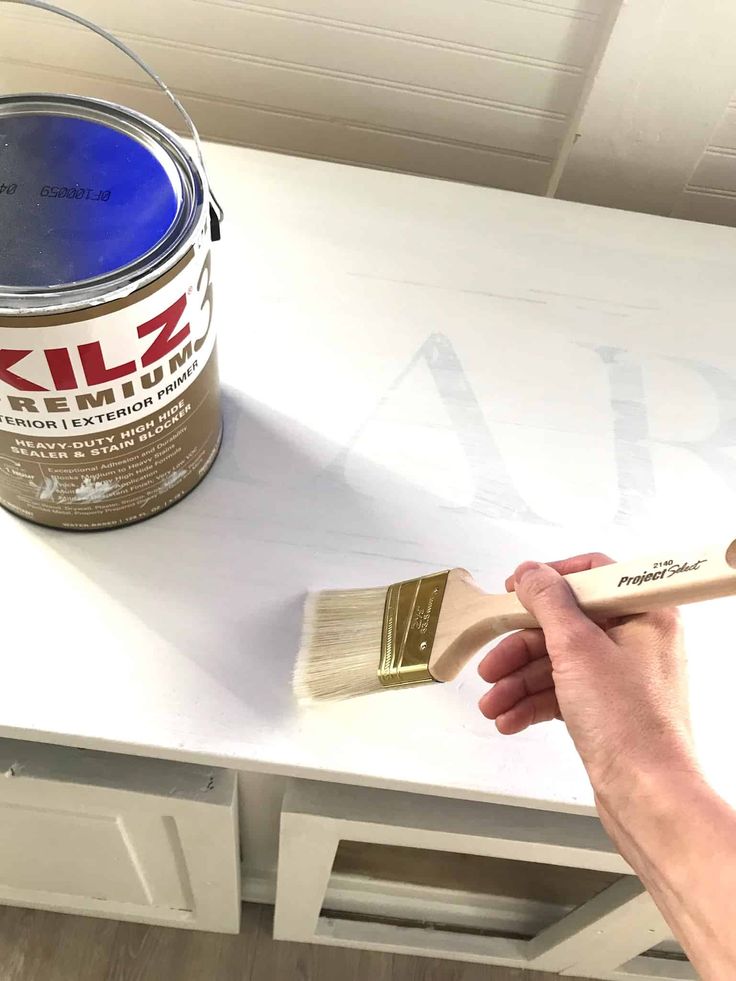
It also hides minor imperfections and brings out the true richness of your paint color, so you can achieve a clean, professional look. For those leaning toward stain, using a wood conditioner is equally important, especially on soft woods like pine, which tend to absorb stain unevenly. A conditioner preps the wood by sealing it slightly, ensuring the stain spreads evenly without blotches, streaks, or dark spots. This gives the wood a rich, consistent tone and enhances the natural grain beautifully. Whether you’re painting or staining, taking the time to apply primer or conditioner elevates the final result, making your furniture look polished, vibrant, and expertly finished. It’s a simple step that delivers big results, setting the foundation for a transformation that brings out the best in your piece.
How to Stain or Paint
- Choose Finish: Stain for a natural look or paint for bold color.
- Prep Area: Work in a ventilated space with a drop cloth; wear gloves and a mask.
Apply First Coat:
- Stain: Use a cloth or foam brush, apply with the grain, then wipe excess.
- Paint: Use a quality brush or roller, applying thin, even coats.
- Dry Completely: Let each coat dry thoroughly (a few hours for stain, 4–6 hours for paint).
- Add More Coats: Repeat until you achieve desired color or coverage.
- Seal with Topcoat: Add a clear coat for durability and shine.
This method ensures a smooth, long-lasting finish for your furniture!
6. Seal and Protect
Sealing and protecting your furniture is the final step that ensures all your hard work lasts for years to come, providing both beauty and durability.
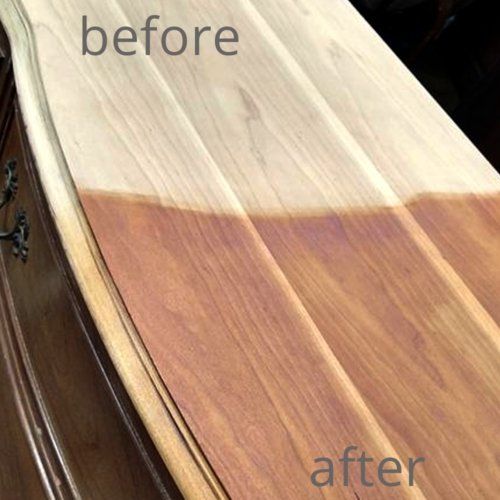
A clear topcoat, such as polyurethane, varnish, or lacquer, acts as a barrier that shields the surface from scratches, moisture, and everyday wear and tear.
Begin by choosing the right finish—water-based options dry quickly and maintain the natural color of the wood, while oil-based finishes deepen the color and add a warm glow. Using a clean brush or a foam applicator, apply the sealant in thin, even strokes, working along the grain of the wood to avoid streaks or bubbles. For a flawless finish, let each coat dry fully (this could take several hours or overnight), then lightly sand with fine-grit sandpaper before applying the next layer. Typically, two to three coats provide optimal protection, but you can add more for high-use items like tabletops. This step not only preserves the finish but also gives your furniture a smooth, polished look that enhances its beauty and makes it easier to clean. Sealing is the key to ensuring your refinished furniture remains stunning and resilient, even with regular use.
7. Final Touches
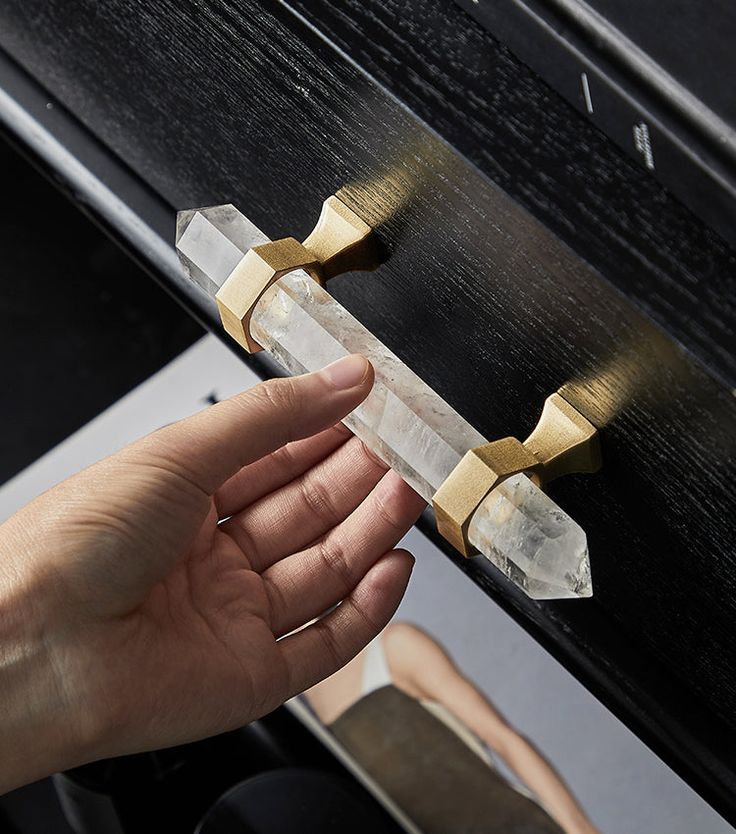
Final touches are what bring your refinished furniture to a professional, polished level, giving it a truly unique and finished look. After sealing, take a moment to inspect the entire piece for any small imperfections. Lightly buffing the surface with fine steel wool or ultra-fine sandpaper can remove any minor rough spots or dust particles that may have settled during drying, resulting in a silky-smooth finish. Next, clean and reattach any hardware—consider replacing outdated knobs or handles with new, modern ones to add a fresh, stylish element that complements your new finish. For an added touch of elegance, applying a furniture wax or polish over the sealed surface can give it a soft sheen, deepening the richness of the color and enhancing the grain.
Finally, ensure every detail is attended to, including wiping down the entire piece with a lint-free cloth for a pristine look. These last, small efforts elevate the piece, making it feel cohesive and refined. By paying attention to the final touches, you add the kind of charm and personality that makes your refinished furniture feel like a brand-new, custom work of art re Finally, ensure every detail is attended to, including wiping down the entire piece with a lint-free cloth for a pristine look. These last, small efforts elevate the piece, making it feel cohesive and refined. By paying attention to the final touches, you add the kind of charm and personality that makes your refinished furniture feel like a brand-new, custom work of art ready to shine in any room.


[…] by poor ventilation in rooms like basements, bathrooms, or kitchens, can cause condensation on wood furniture, floors, or walls, which encourages mold […]